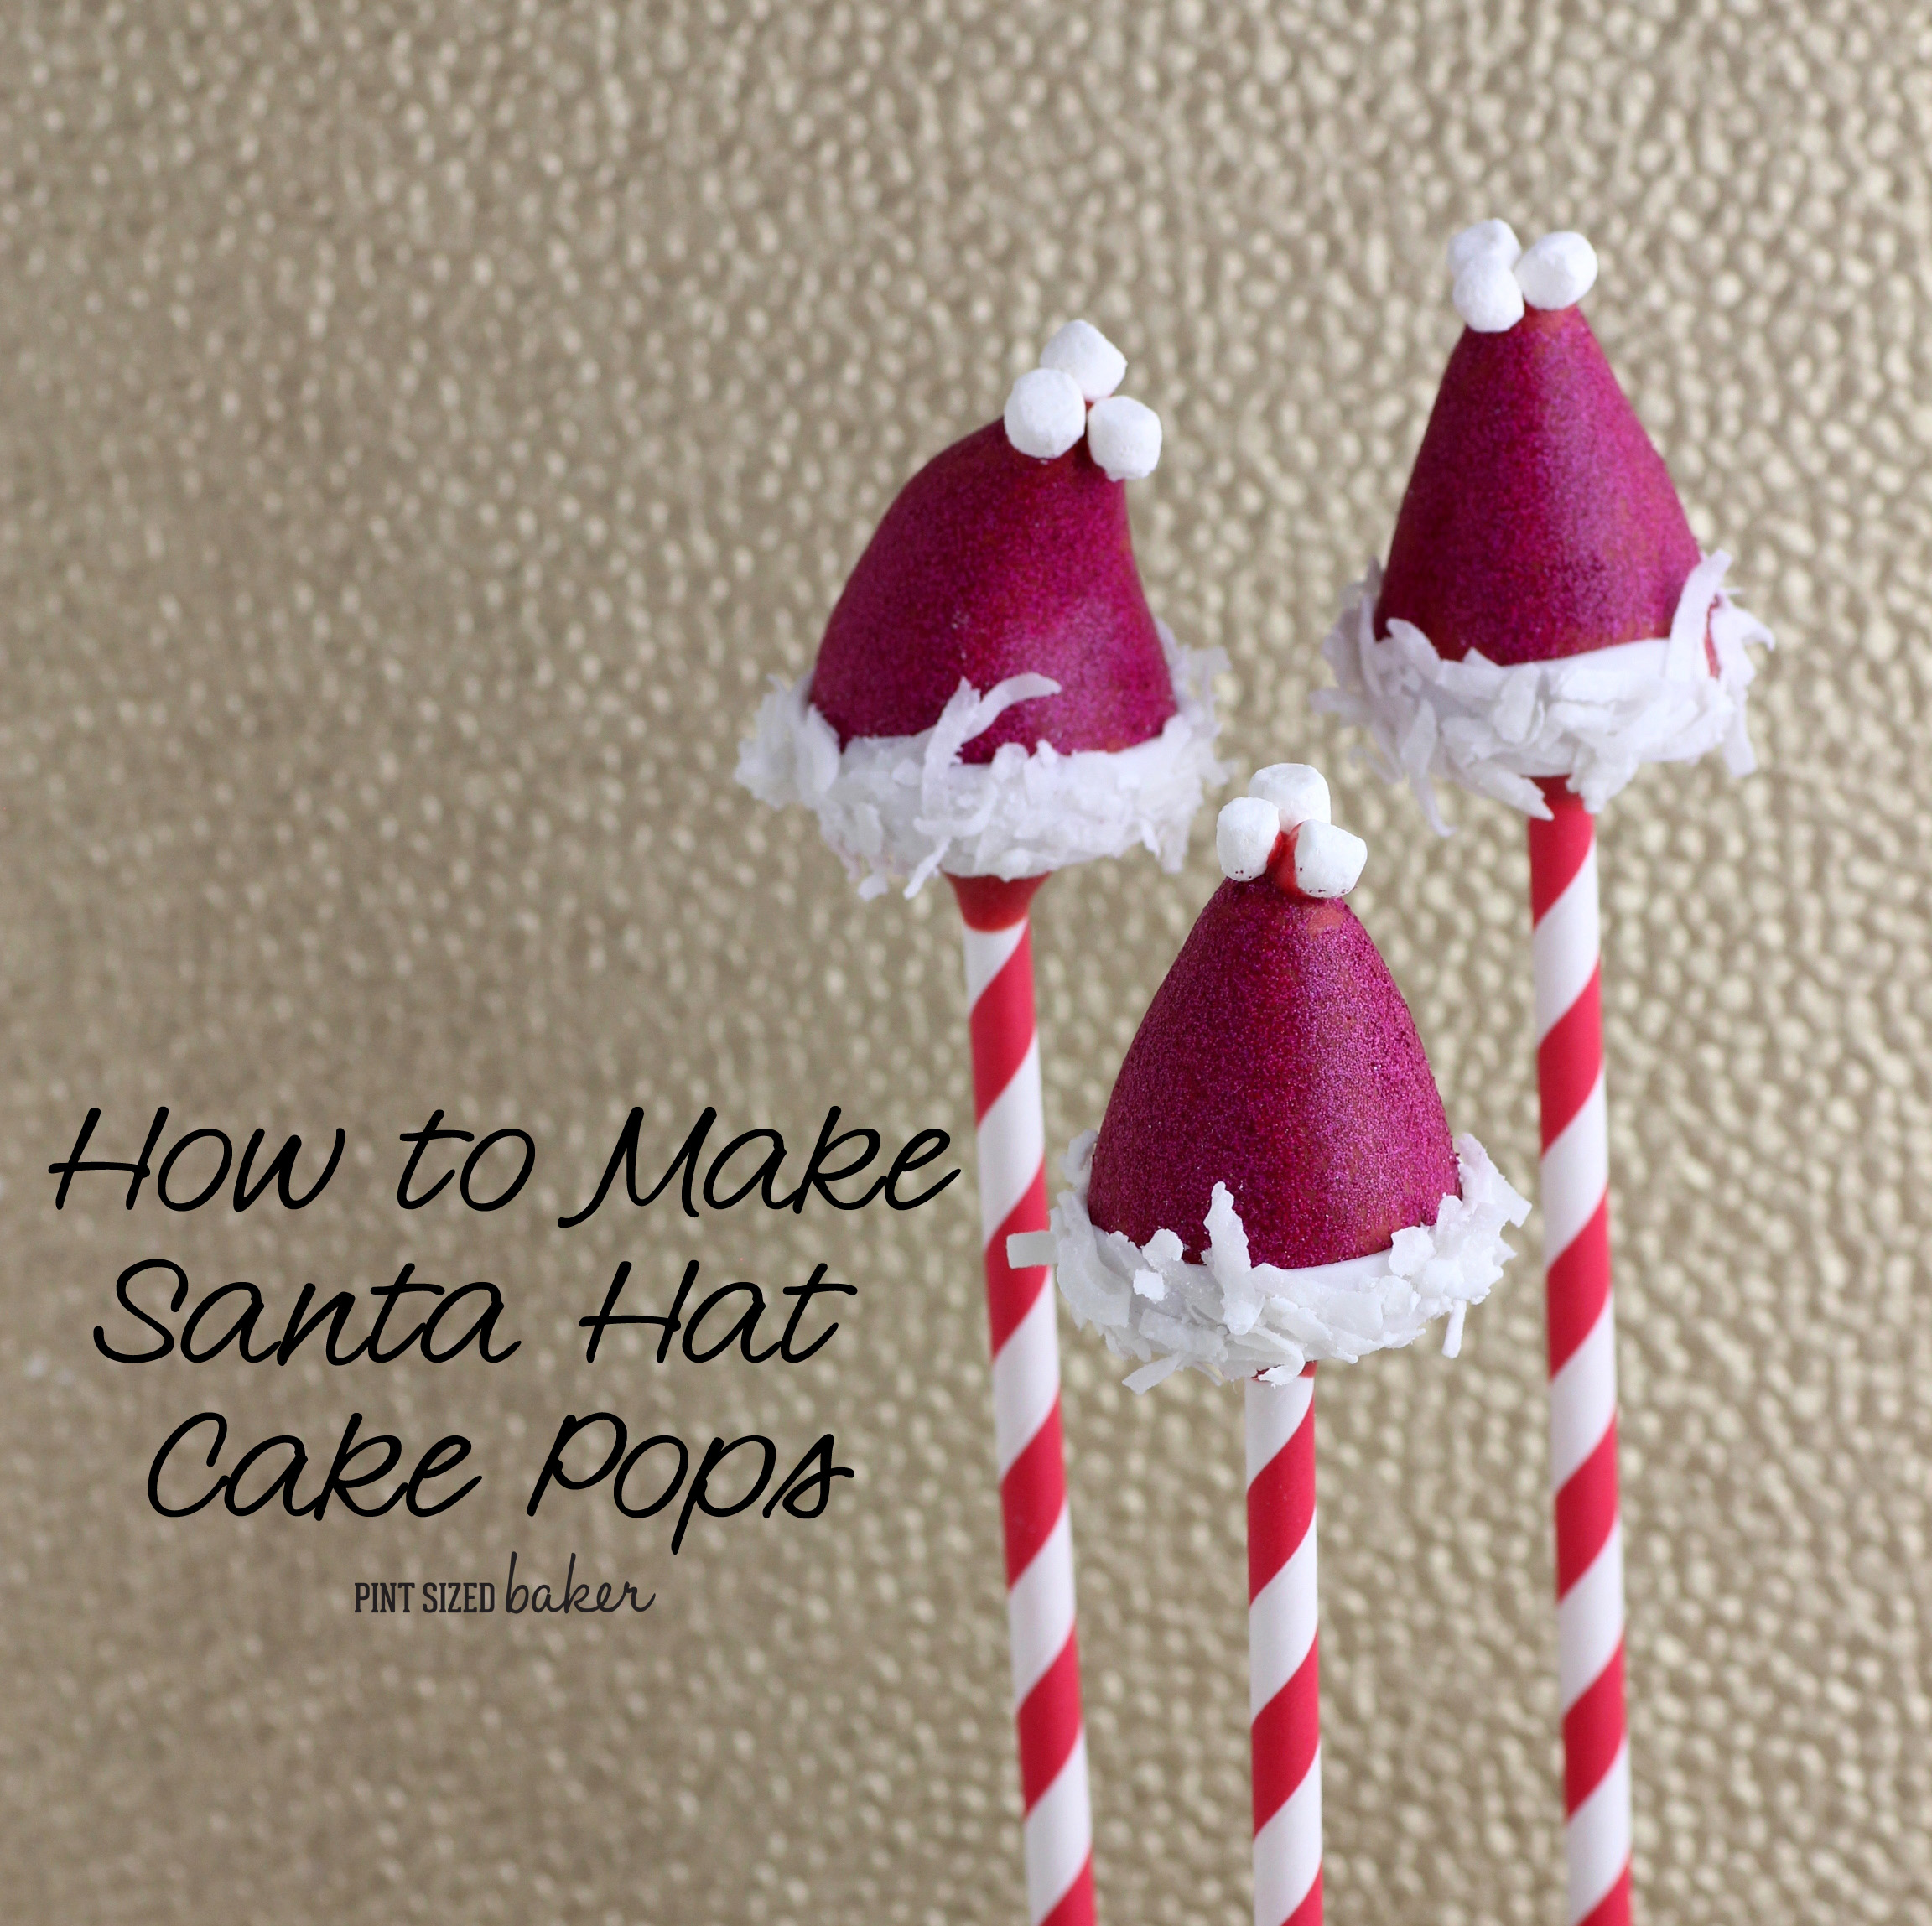
Santa Hat Cake Pops
Hi Everyone! I’m Karyn from Pint Sized Baker and Dieter’s Downfall and I’m a new contributor here to Juggling Act Mama. I, too am a juggling mama – with a daughter and husband, three cats, a hamster, an two blogs. It’s a crazy household, but it makes me happy.
I share Cake Pop tutorials. I hope that you enjoy these easy tutorials. For out first tutorial, we are going to make some fun and easy Santa Hat Cake Pops! Don’t worry, they really are easy to make.
To get you started, if you’ve never made cake pops before, please check out THIS VIDEO on making the cake pop dough and then THIS VIDEO on dipping them. It’s not hard, but it does take practice.
Ready to get started? Let’s go!

I always start with 1/4 of a 9×13 cake. Your favorite flavor of box mix will do – and yes, it’s the same if you’re working with a gluten-free cake mix. Place 1/4 of a cold, baked cake into a stand up mixer or into a food processor. To that, add 2 tablespoons of cold frosting. Having a cold cake and cold frosting will help with it being sticky.
Mix it with a paddle or pulse it until a dough ball forms. Use a 1 tablespoon cookie scoop to equally measure out the pops. You should get 10 – 12 cake pops. Don’t make them too large. Now, roll the pops smooth. To make shaping easy, I used a triangle cake pop mold. Simply press the cake ball into the mold and press. They all turn out the same size and shape – Perfect!
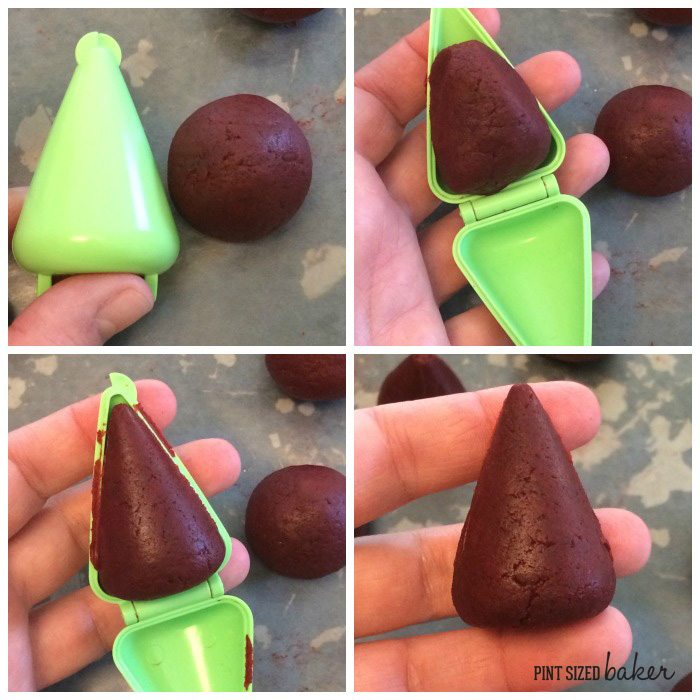
Once, they are all shaped, place them on wax paper. You can place them in the fridge if you can’t get to them in the next 30 minutes, but if not, just move them to the side while you melt your candy melts.
Melt your red candy wafers in a microwave safe mug. Place them in the microwave for 1 minute on high. Remove and stir then return to the microwave for 45 seconds at 70% power then stir until all the disks are melted. The candy should be smooth and fall off the spatula in an even ribbon, not in big blobs.
Get some lollipop sticks or fancy paper straws, dip 1/8 inch into the melted candy, then insert it halfway into the cake pop. Complete adding all of the sticks. You can stand up the cake pops in a narrow glass, in floral foam, or in a nice cake pop stand.
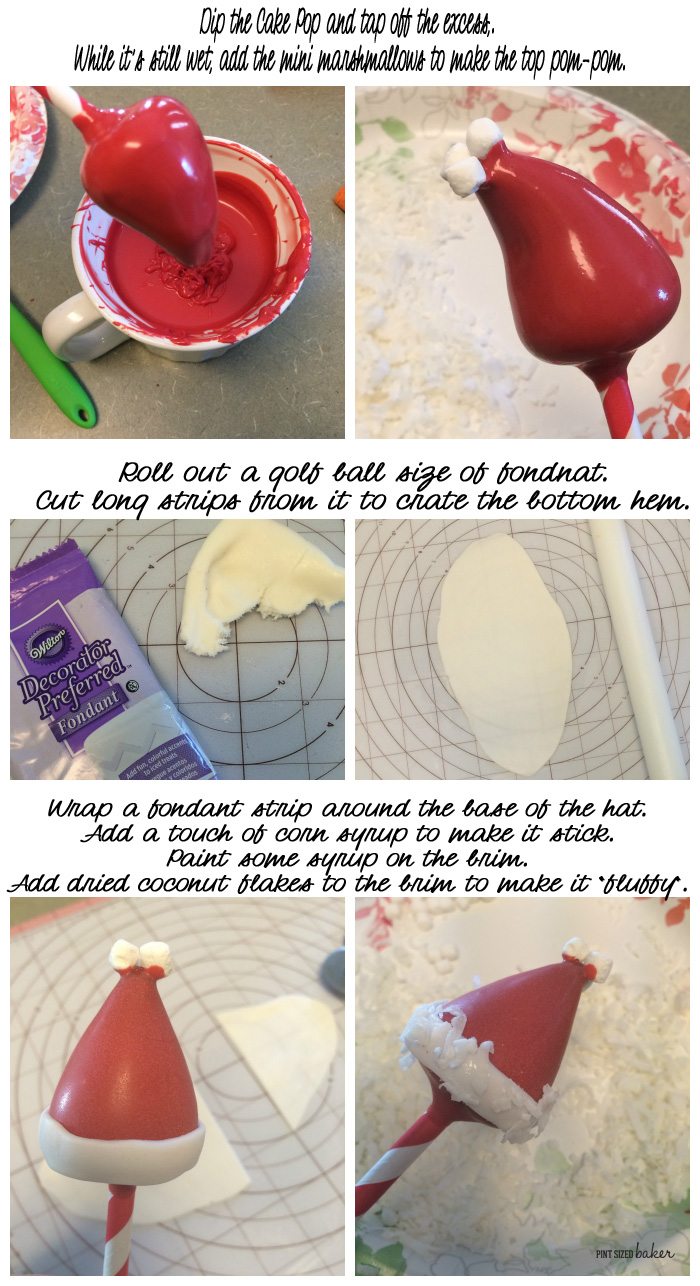
To dip the cake pops, dip straight down into the candy covering it completely, then straight back up. Do not twist the pop in the candy. Tap off the excess candy and when it’s done dripping, add three tiny dehydrated marshmallows to the top or one standard mini marshmallow to the top to make the pom-pom. Stand it up to completely dry and dip the remaining pops.
I love the new mini bags of Wilton Fondant. It’s perfect for little accents like the trip on the hats. Simply roll out a golf-ball sized amount and cut long strips to go around the base of the hat. To attach, you can use a drop of candy or a touch of corn syrup. It should stick all on its own. Then “paint” on some corn syrup on the fondant (just a little bit) and then press the shredded coconut flakes onto it and you’re done!
Easy right?
I knew you could do it!
Wanna make them sparkly Mrs. Santa Hats? It’s easy to do. Once the hats are dry, but before you add the bottom trip, get some red disco dust and a clean (NEW, only for food) paint brush. Paint a small area of the cake pop with vanilla extract, then dab on the disco dust. It will stick on and make the hat super sparkly! All the girls will love it!
Then you can proceed with adding the bottom trim.
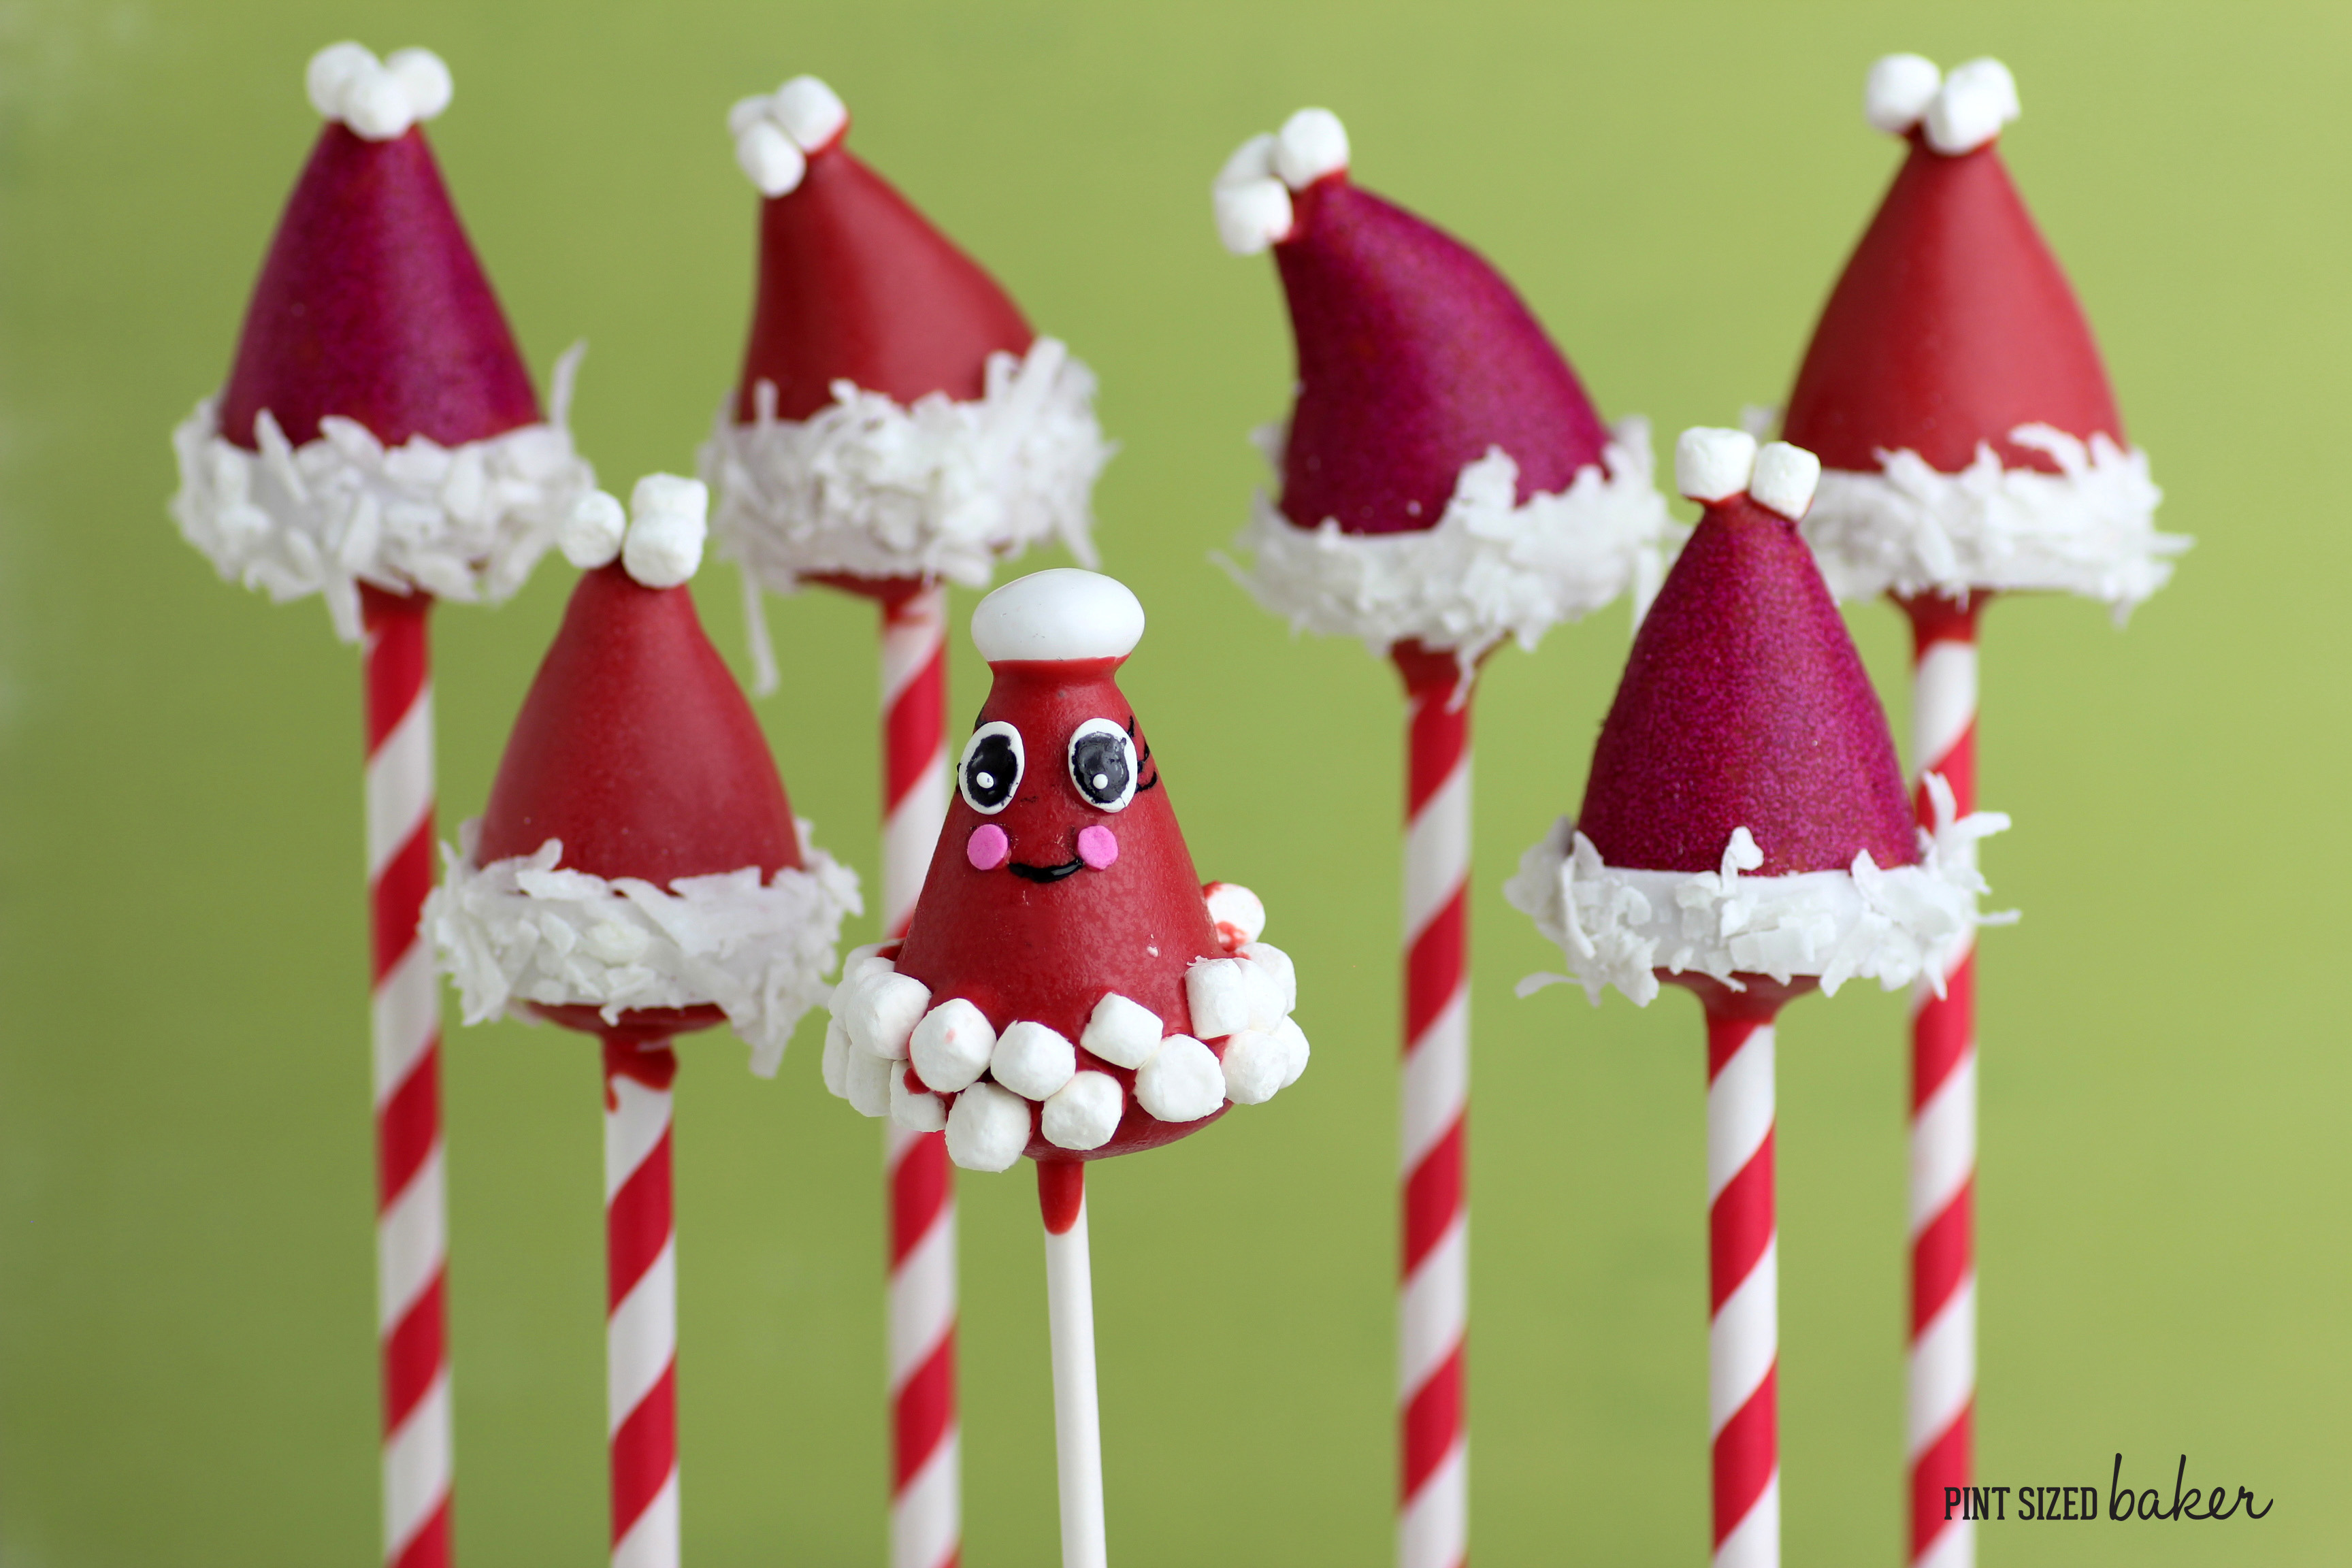
And, because I love my kiddo, I had to make her a cutie Kawaii Santa Hat!
I used a large, white M&M for the top, Easter Egg Sprinkles for the eyes, pink sprinkles for the cheeks and added the black details with black cookie icing and a toothpick. It’s more work, but she turned out so cute!
I hope that you enjoy them! It’s a fun activity to do with the kids on the cold weekend and the Christmas Holiday. They are also fun for class gifts and teacher gifts.
These are so cute. Thanks for telling us how to make them!
Those look great. A nice flare for Christmas treats.
I will need to try this. It is too cute.
How cute!!
oh my! these are fabulous!!!!
I have to go scout the markets today for those triangle cake pop molds to make this for the holiday.
Honestly, so cute! We love cake pops and to see them like little santa hats, it’s genius 🙂
Cute! Where did you find the triangle cake pop mold?
Those are from a company called “My Little Cake Pop”. The link to Amazon is in the post to order them.
Very cute